Astrophotography Plans
I’ve been trying to get into astrophotography (obviously). Here is the plan I initially came up with.
- Join an astronomy club
- Get a “smart telescope”
- Spend time using the smart scope and its software stack
- Use the subs gathered from the smart telescope with more advanced stacking and image processing
- Start buying more expensive equipment
I’m currently on step 3.
(1) Join an Astronomy Club
I joined the Denver Astronomical Society. I have nothing but good things to say about this group! If you’re trying to get into a hobby such as this, I recommend finding your local club and joining before you spend any money on equipment.
(2) Get a Smart Telescope
I chose the Dwarf 3. The SeeStar S50 was tempting, with its larger aperture, but the Dwarf had a native equatorial mode. Even though the SeeStar eventually got its own equatorial mode, I’m still very happy with my choice. But I bet the SeeStar line is good too.
You have to set expectations. You’re not going to take photos that rival the best photos you see on AstroBin. You’re not going to get photos that require long focal lengths, e.g., planets. But there’s so much to learn! My blog up to this point is pretty much made up of content from these lessons.
(3) Spend Time Using the Smart Scope and Its Software Stack
As far as I know, all of the smart telescopes have a way to easily stack your subs and maybe do some basic image processing. DwarfLabs has some really good basic stuff here.
The telescope does its own stacking on-device. You can see the stacking progress as you go along. The Dwarf also offers “MegaStack” for combining data from several sessions. MegaStack also lets you go in and delete subs individually. This has come in handy at certain times, like when your target goes behind a house but the automatic stacking doesn’t notice, and you get a bad result.
The Dwarf also has “StellarStudio,” which can do stretching, star correction, star removal, and other things. I have had StellarStudio run its “auto” profile over almost all of my photos, and the results are good. Can I do better with more advanced software and techniques? I hope so, but this is a great place to be for now.
The other huge win that the Dwarf software has (and I imagine the other smart scopes have) is the ability to schedule different targets throughout the night. I don’t have to stay awake. With a smart scope, there’s no “meridian flip” to worry about. A typical night is to focus, polar align, then go inside and set up a schedule. If you’re okay with Alt/Az mode, you can just plop the scope outside, and it will focus, calibrate, aim, and shoot all night long without any intervention.
Lessons Learned So Far
The biggest surprise for me was just how well this works in the face of light pollution. My house has a Bortle number of over six. Before getting started, I obsessed over how I could get to a dark sky site to do photography.
update 2025-10-08: I mean, look at this. Does this look like a Bortle 6.5 site in the suburbs to you?
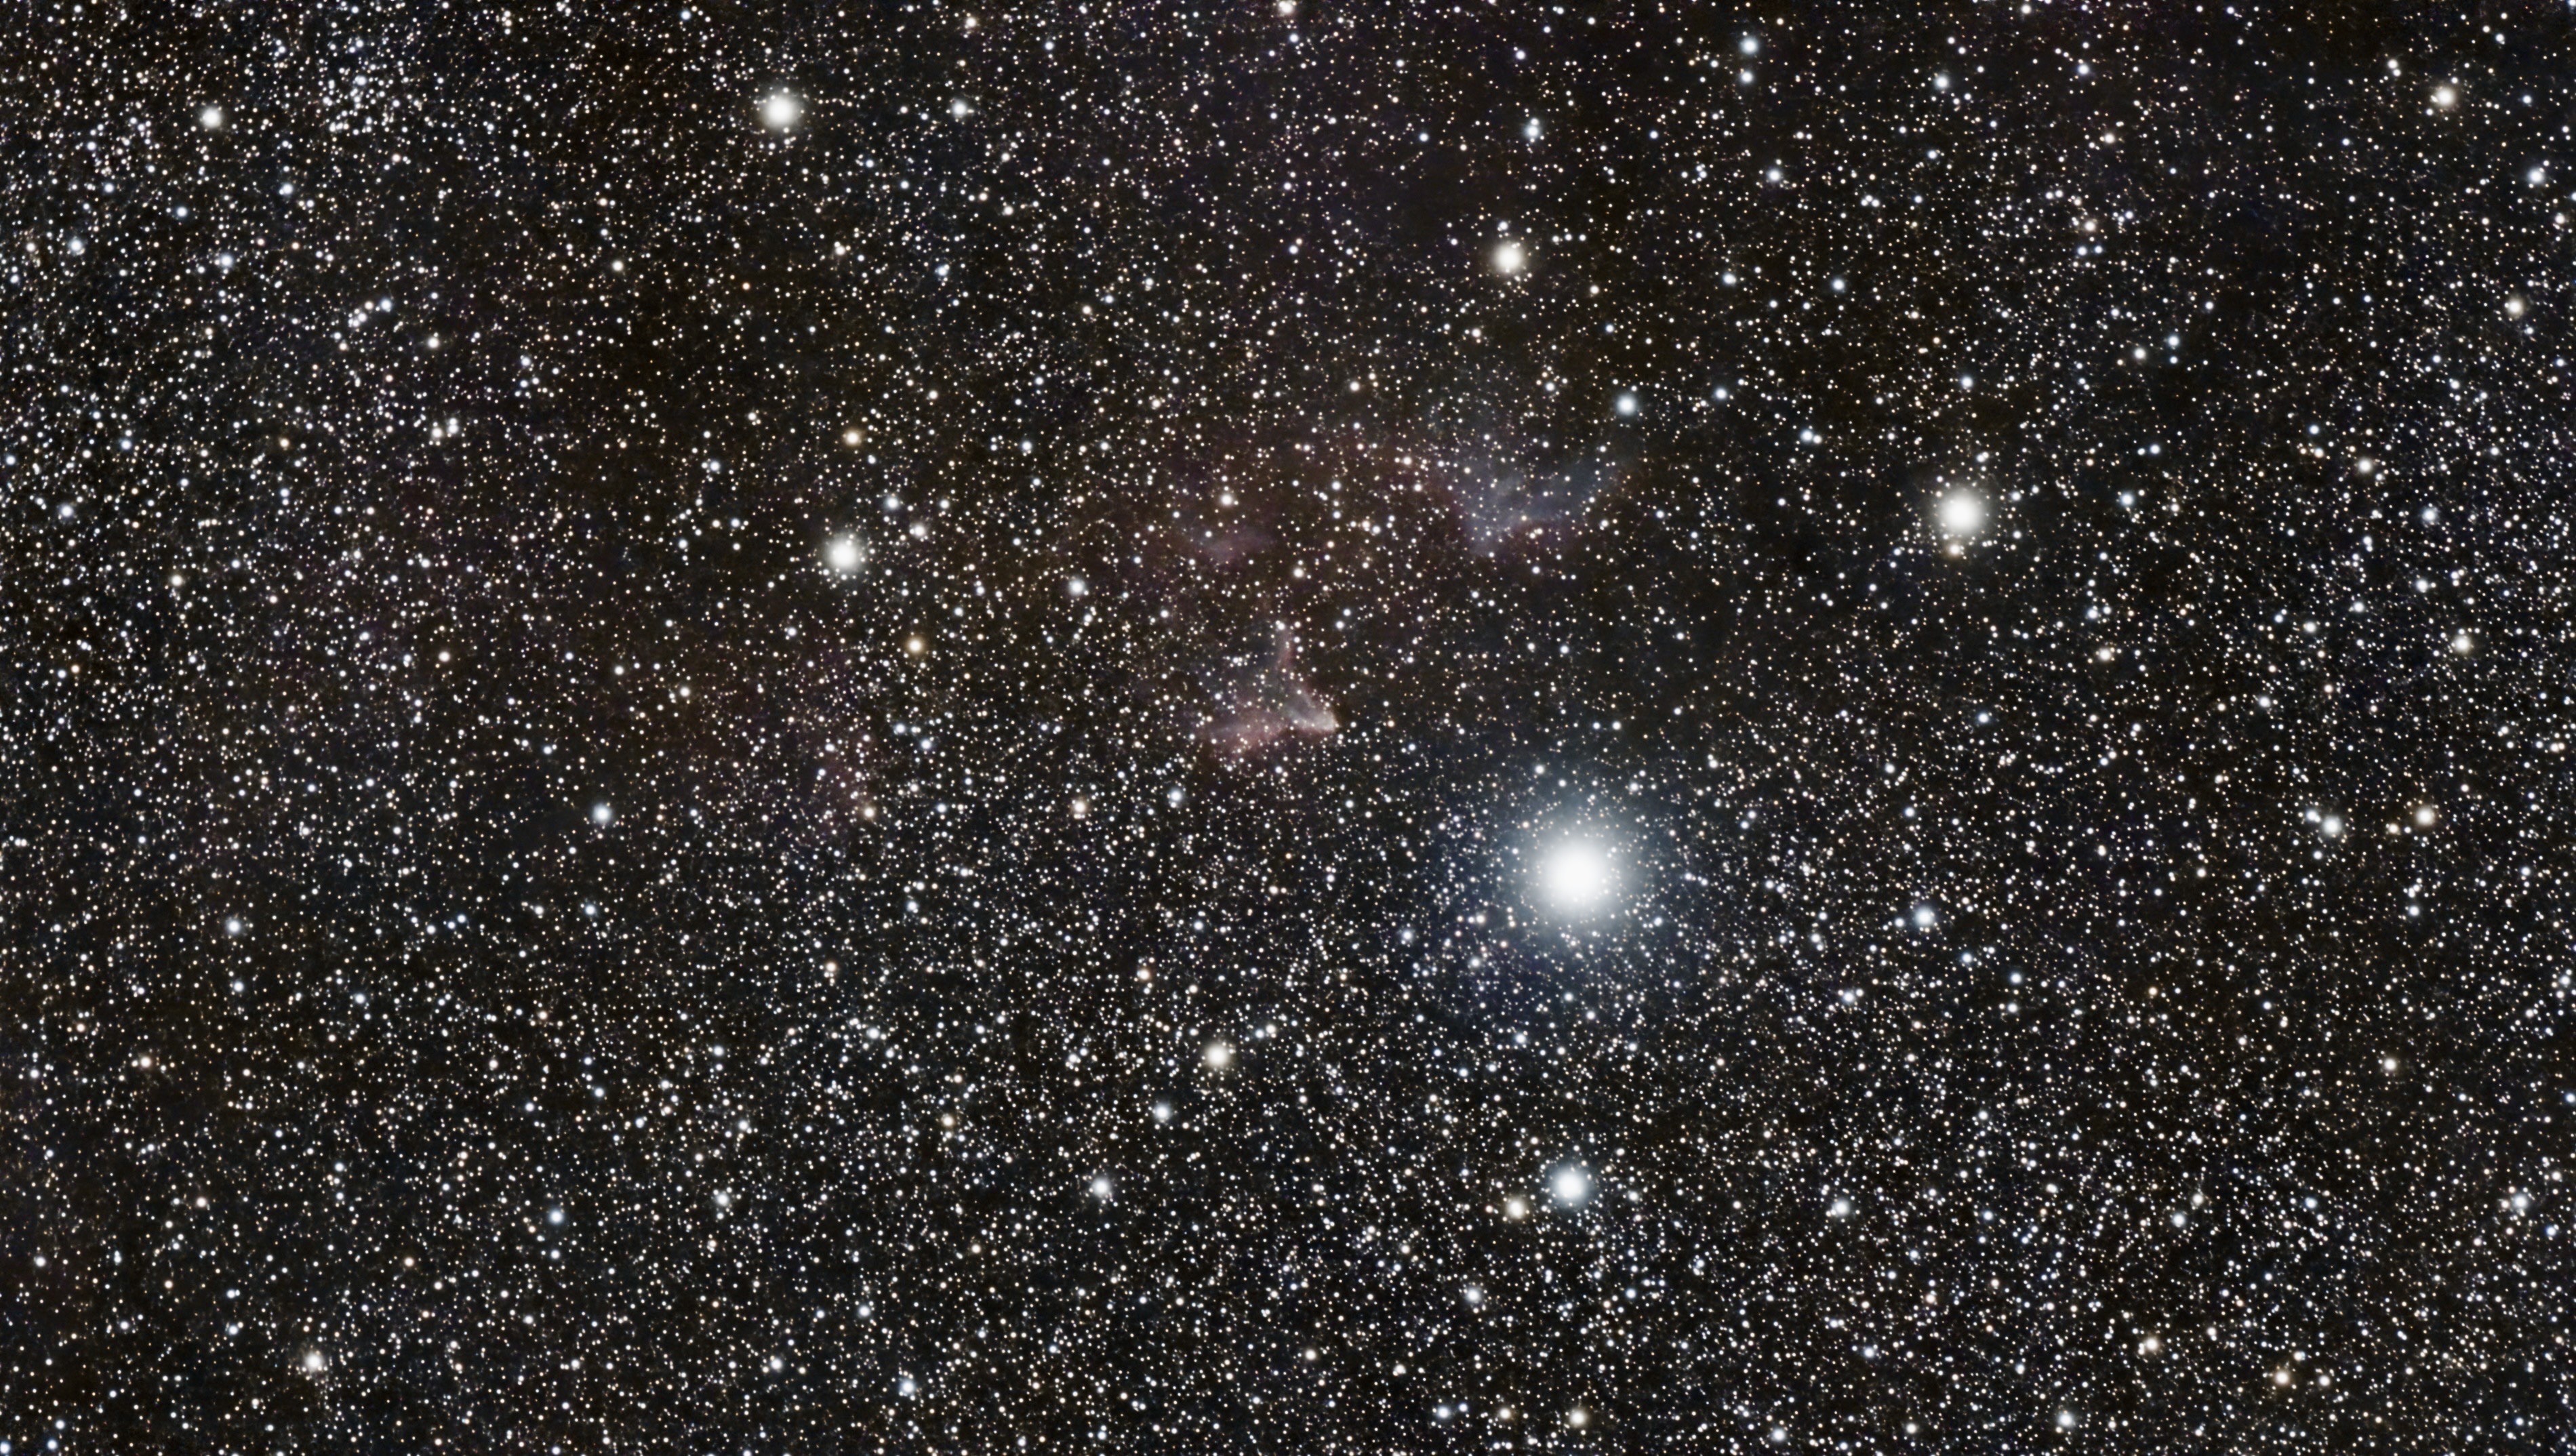
IC 63, The Ghost Nebula; 418 subs, 60 secs, 60 gain, astro filter
Instead of light pollution, the big problem is “things getting in the way.” Trees, mostly, and houses. When we did the landscaping for our house, I wanted lots of trees, and we were maybe a bit too successful. I have pretty good exposure near the north celestial pole. For objects without high declination, I have to put the scope on top of our camper van, facing east. Even then, there’s a large tree just to the south, blocking a lot of interesting targets.
(4) Using the Subs with More Advanced Software and Techniques
This is next for me. I’m publishing a lot of my photos here, on Telescopius, and sometimes on AstroBin. But I want to try for more, so I’m keeping all of my subs around.
I will probably buy PixInsight this coming fall.
(5) Moving On to More Expensive Equipment
I’m not planning to do this very soon. Even when I do, I expect to keep the Dwarf 3 since it goes well with our van-based travels. It’s so tiny that I sometimes forget to unpack it right when I get home because it’s so unobtrusive.
When I do move up, I want to do it incrementally. I’d like to spend a bit of money, then enjoy what I have before upgrading again. Here are my tentative plans.
- Get a good tripod
- Use the new tripod with the Dwarf 3
- Get a mount and a longer-focal-length telescope (OTA)
- Get whatever else is needed to make the new OTA useful
A good tripod could be used with the Dwarf 3. The small tripod that they sold along with the telescope is good enough for almost anything, but at a star party or any place where people might walk through the area, having a big tripod would probably be safer than the tabletop rig I have now.
After the tripod, the next steps will be difficult. An apochromatic refractor is what most people would recommend for starting out, but the Dwarf 3 is an APO. That’s not to say I would never get a higher-end APO, just that it wouldn’t be my next OTA. So maybe it will be a Newtonian or even a Ritchey-Chrétien.
But then I’ll need a camera. I’ll eventually want a cooled mono camera, but that needs more supporting equipment. What about the short term? A DSLR? With or without its infrared filter removed? A lower-end one-shot-color astro camera? This is where it starts to feel like falling off a cliff.
I have a while to go before I need to worry about all of that.